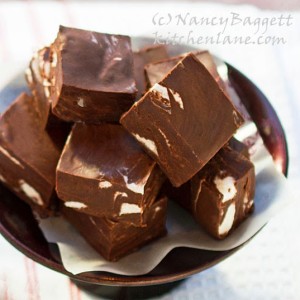
| Nearly Foolproof No-Beat Fudge! Great Tasting, Too! |
Author: Nancy Baggett
It’s important to use a pot that holds at least 6-quarts; the cream-sugar mixture will boil up over the sides and make a mess in a smaller one. And never substitute a semi-sweet or bittersweet chocolate for unsweetened or 99 to 100 percent cacao chocolate. (Use either 7½ or 8 ounces depending on whether you like a slightly milder or more bittersweet fudge.) The unsweetened chocolate is essential not only because it provides the right amount of chocolate to balance the sugar, but because it contains the right amount of natural cocoa starch to stiffen the fudge as it stands. This happens best at room temperature, so don’t refrigerate the fudge right away. It’s best to use a candy thermometer, but you can make this fudge without one. Just watch closely for the cream mixture to thicken and turn a light dulce de leche color as described below. Then remove it from the heat and proceed as directed.
Ingredients
- 8 ounces unsweetened chocolate (or 99 to 100 percent cacao chocolate), coarsely chopped or in small chunks
- 2 cups heavy (whipping) cream
- 1½ cups granulated sugar
- ⅓ cup light corn syrup
- Pinch of salt
- 1 cup marshmallow fluff
- 2½ cups mini-marshmallows
- 2 teaspoons vanilla extract
- 1 cup chopped walnuts or pecans, optional
Instructions
- Line an 8‑inch (or for thinner fudge a 9-inch) square pan with aluminum foil, allowing it to overhang on 2 sides. Put the chopped chocolate in a large, microwave-safe bowl. Microwave for 30 seconds on high power. Stir lightly, then microwave 30 or 40 seconds longer. Stir and set aside.
- Combine the cream, sugar, corn syrup, and salt in a 6‑quart or larger heavy non-reactive pot or enamel-coated Dutch oven. Bring to a boil over medium‑high heat, stirring with a long‑handled wooden spoon. As the mixture boils and rises up the sides, continuing stirring until it begins to subside, about 4 to 5 minutes.
- Adjust the heat so mixture boils briskly, occasionally gently stirring and scraping the pan bottom. Continue boiling, stirring frequently, about 5 to 7 minutes or until the mixture begins to boil down, thicken just slightly, bubble loudly and turn a pale beige color. Then, to avoid scorching, lower the heat so the mixture boils very gently.
- If a candy thermometer with a clip is available, clip it to the pot, submerging the tip in the candy, but not touching the pan bottom. Otherwise, just start frequently testing with the candy thermometer available. Cook, stirring constantly and scraping the pan bottom and sides and watching carefully to prevent scorching, about 3 to 5 minutes longer. When the mixture turns a very pale light caramel or dulce de leche color and reaches 234 to 235 degrees F, immediately remove the pot from the heat (with pot holders), stirring. Pour the mixture over chocolate, being careful not to burn yourself. If the bottom of the pot looks grainy or as if it is beginning to scorch, don't scrape out the last of the mixture.
- Add the vanilla and marshmallow fluff to the bowl with the chocolate. Stir the mixture with a clean wooden spoon until the chocolate is fully melted and blended in and no streaks remain; this will take several minutes. Be sure to scrape up the mixture from the bottom. If the fudge looks oily and separated or is too stiff to stir, vigorously stir in up to 6 teaspoons warm water a teaspoon at a time; stop adding as soon the mixture smooths out and looks creamy. Fold in the nuts, if using, until evenly incorporated. Then lightly fold in 2½ cups marshmallows, stopping before they begin to melt into the mixture. Immediately turn the fudge out into the prepared pan; quickly smooth out to the edges with a lightly greased table knife.
- Let the fudge cool on a wire rack. Cover and let stand at room temperature at least 8 hours and preferably overnight; this allows time for the natural chocolate starch to firm up the fudge. Then refrigerate, wrapped airtight, for up to 10 days. Alternatively, freeze airtight, for up to a month.
- Let the fudge slab thaw or warm up slightly before cutting. Lift the foil and slab from pan. Carefully peel off the foil; place the fudge slab on a cutting board. Using a sharp knife, trim off and discard the uneven edges all around, if desired. Cut the fudge into quarters in one direction and sixths in the other to yield 24 pieces (or cut in bigger pieces, if desired). Pack airtight and store in a cool place for up to a week. Or freeze airtight for up to 1 month; thaw in the refrigerator, then let warm to room temperature before serving.
- Makes about 1¾ pounds plain fudge, 2⅛ pounds nut fudge.
Recipe by KitchenLane at http://kitchenlane.com/2011/11/99percentfoolproof-fudge-no.html