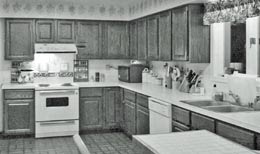
 Several years ago I had my fairly roomy but inconvenient, dreary and dated 18-year-old kitchen gutted and built the workspace I’d always wanted. (See the “before” pic below.)
The experience was stressful and disruptive, but I did end up with the functional “cook’s” kitchen I’d coveted for years. I still smile when I walk into the space everyday.
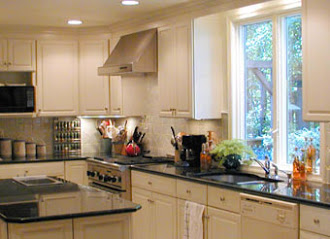
 Of course, I wanted a more convenient place for testing. But it also had to be attractive enough for an occasional video filming which is taking place in the pic at left or for a photo shoot, like the recent one for a story for Country Gardens Magazine. (That’s when the pic below right was taken; the story ran in the spring of 2012.)
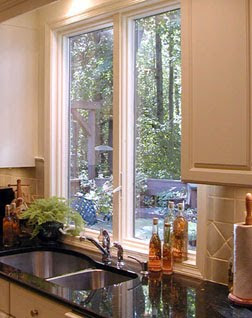
Now, looking back, I’ll still really happy with how my make-over came out. I love the ample counter and storage space, and the generous kitchen window that provides both lots of natural light and a great view.
 Here are some tips I learned:
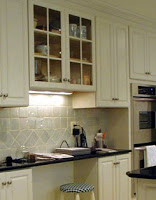
Think about how the space will be used. I’d always felt my space was wasted so began by coming up with a new floor plan. First and foremost I wanted a center island; it actually rotates, btw! I also decided to move the range to the same wall as the sink, reposition the refrigerator to the bottom of the U, and add two supplemental stacked wall ovens to accommodate all my baking to the right side of the U. (These are visible in the far right of the bottom photo.) To be sure this arrangement would really work, I mentally walked through it repeatedly, opening imaginary doors and cooking and baking imaginary recipes.
Consider what extras really matter to you. I wanted to maximize storage space so decided on cabinets that reached to the ceiling. Yes, they necessitate keeping a stool handy (I planned a spot for it right in the kitchen) to access items on the top shelves, but now I finally do have a place to stash everything. Although under-cabinet lighting is often viewed as an extra, I considered it essential. A serious cook needs good lighting and this is the most effective way to illuminate wall counters. I had wanted a bump-out bay window over the sink, but when I learned that it would need more wall space and would mean one less storage cabinet, I gave up the idea. Instead, I decided to maximize the woodland view and natural light with a counter-to-ceiling window–the largest standard size we could fit.
Do your homework when selecting your materials. Laminate counter tops didn’t appeal not only because they showed too much wear and tear (especially cuts and burn rings), but because I wanted a fresh, more contemporary, natural look. I eliminated butcher block from consideration because it absorbs grease and moisture and has to be oiled periodically. I drooled over gorgeous marble and limestone tops in a local showroom until I learned that drool–or any other moisture–can watermark limestone and even marble. So I focused on the less porous, more practical granite. This stone isn’t impervious to moisture either–a refresher coat of sealer may need to be wiped on every few years–but this seemed a reasonable maintenance demand considering its overall toughness and beauty. For me, another big plus of granite was that it’s great for rolling out pastry doughs.
I’d found ceramic tile durable, attractive, and easy to maintain on kitchen walls in a previous home, and decided on it again. (It’s also preferred as a safety feature for walls right behind professional-style gas stoves with high-BTU burners like mine.) Having had wood, ceramic tile, and vinyl flooring in heavily trafficked areas of other houses, I also knew ceramic tile was the most durable flooring option and, in the right color (not white!), the easiest to maintain. Plain cream or white shows every smudge and crumb and needs nearly daily washing, but a heavily mottled or flecked off-white one with a low-gloss surface (not slippery when wet) lends a light, bright look but without requiring excess maintenance. It’s hardness means that ceramic tile flooring is also harder on the feet, but it’s important to wear comfortable, thick-soled walking shoes while working.
I’m grateful I don’t have to face renovating again, but also very glad that I did. What a pleasant place to spend my days cooking and baking.

Leave a Reply