Lately, with a lot of show-and-tell book promotion
activities for Simply Sensational Cookies on the agenda, I’ve been totally
focused on cookie baking and decorating. But, out of desperation, this week I was
forced to stop and come up with this new recipe for yeast bread instead.
teeth set for their appealing rustic seeded loaf. But almost invariably, it was already sold
out—grrr! A few times I mentioned to the staff that this was really disappointing
and that perhaps they should consider preparing a larger batch. Apparently,
nobody heeded this advice.
make enough of a particular bread to satisfy regular customer demand?
Mismanagement? Orneriness? The idea that running out avoids waste or keeps patrons
clamoring for more? I don’t know, but, I no longer care! Armed with an ingredient label from the last precious
boule purchased from the shop, plus the basic method used for many breads in my
2009 Kneadlessly Simple cookbook, I
devised a recipe in hopes it could yield bread to stand in for their rare loaf.
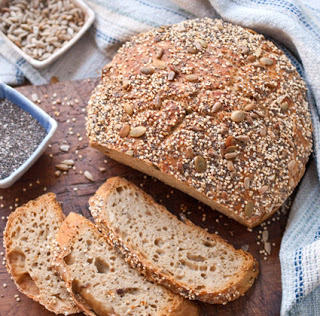
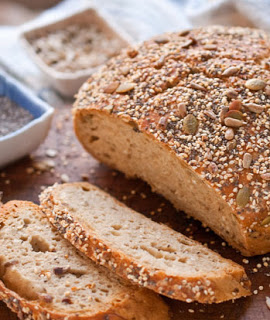
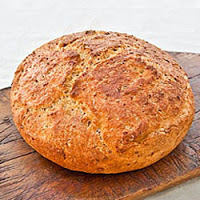
The wholesome wheatiness (tamed with a touch of brown sugar), and rich nuttiness
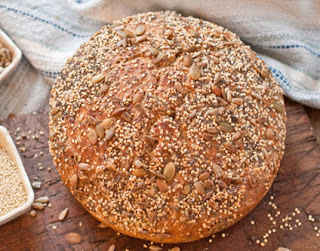
from an ample sampling of seeds are spot on in my replacement loaf. And the
nubby, crispy, seed-studded look is on target, too. The texture of my bread is a bit different
(though just as tempting). As you can see in the shot at the very top, it’s holey and open in the manner of
some artisan breads, plus due to fuller gluten-development the crust on my
no-knead version is chewier and crumb springier than those in the prototype. It’s a
good thing my first set of photos turned out, because we scarfed down much
of the loaf as soon as I was done shooting. In case you’re skeptical that a kneadless bread could possibly
have superior gluten development over one worked with powerful kneading equipment,
let me explain. While the baker completely skips the usual pushing, pulling,
stirring or beating that causes two proteins, glutenin and gliadin to come
together and form rubbery gluten strands, in the following no-knead method the
dough actually KNEADS ITSELF!
slightly soft (but not runny or batter-like) side. Second, the dough sits so the yeast can bubble
and ferment for a long time (12 to 18 hours), which, on the molecular level
causes the glutenin and gliadin particles to bounce around and form gluten even
more thoroughly than kneading usually does. (The shot of another dough rising in a glass bowl at right shows the many gas bubbles that are formed during a long rise.)
And as professional artisan bakers will tell you, there’s another benefit of a very slow,
cool rise: An extended, leisurely fermentation develops the fullest, most satisfying yeasty
bread flavor.Seeds-a-Plenty Kneadless Whole Wheat Boule
the seeds, both in and on the loaf. They
lend taste, texture, eye appeal, fiber, and nutrients, so don’t skimp and use
at least three and preferably more kinds. The loaf shown includes sesame,
millet, pumpkin, sunflower, and chia seeds, and I would have also added flax
and poppy seeds if they’d been on hand.
bread requires no hand-shaping. The risen dough is simply turned out into the
preheated round baking container, which automatically forms it into a boule.Don’t worry if the dough looks shaggy or misshapen at first—it will even out
nicely as it bakes. If at all possible, bake this loaf in a Dutch oven or
oven-proof casserole in the 3 1/2-quart, or 8 ½-inch diameter range. This size provides enough room that the dough
can expand fully, but is not so large that it flattens out into a low
loaf. (A larger pot will work; it just
won’t produce a high, round boule.)
The
bread usually doesn’t stick to seasoned plain or enameled cast iron pot, but it’s a good idea to spritz the interior with a little nonstick spray
immediately before you turn out the dough into it just in case .
heaping cup of ice cubes for 1 minute. Discard the cubes and measure out the
water needed. Also note that the recipe calls for fast rising or bread machine
yeast; regular active dry yeast will not perform well with this ice water
rising method.
whole wheat flour
(gold and/or brown), poppy, sesame, millet, and sunflower
for coating dough and spritzing the baking container
flours, brown sugar, salt and yeast. Vigorously stir the water into the bowl,
scraping down the sides and mixing until the ingredients are thoroughly
blended. If the mixture is too dry to incorporate all the flour, stir in more
water, a bit at a time, just enough to blend the ingredients and yield a slightly
soft, but not wet dough. If necessary, stir in a little more water or more flour
to yield a dough that mounds, then very slowly spreads out in the bowl. Brush or spray the top with oil. Cover the bowl with plastic
wrap. If desired, for best flavor or for convenience, you can refrigerate the
dough for three to 8 hours. Then let it rise at cool room temperature for 12 to
18 hours. If convenient, vigorously stir the dough once about halfway through
the rise.
the dough, gradually sprinkle over and work in a generous half of the seeds.
(Do the best you can to distribute them fairly evenly throughout, but don’t
worry about perfection.) Brush or spray the surface with oil. Re-cover the bowl
with plastic wrap that has been coated with nonstick spray. Let rise using any
of these methods: for a 1 1/2- to 2 1/2-hour regular rise, let stand at warm
room temperature; for a 1- to 2-hour accelerated rise, let stand in a
turned-off microwave along with 1 cup of boiling-hot water; or for an extended
rise, refrigerate, covered, for 4 to 24 hours, then set out and let come to room
temperature. Continue the rise until the dough doubles from the deflated size;
remove the plastic if the dough nears it.
put a rack in the middle third of the oven. Set the pot and its lid on the rack
to heat at the same time. Preheat to 425 degrees F. Heat until the oven reaches
425, then continue 5 minutes more to thoroughly heat the pot. Remove the pot,
using heavy mitts and place it on a dry tea towel. Quickly spritz its interior evenly with a
little non-stick spray. Sprinkle about a
tablespoon of the seeds into the pot. Taking care not to deflate the dough (or
burn yourself), immediately loosen it from the bowl sides with an oiled rubber
spatula and gently invert it into the pot. Don’t worry if it’s lopsided and
ragged-looking; it will even out during baking. Sprinkle the seeds evenly over
the dough top. Immediately top with the lid. Shake the pot back and forth to
center the dough.
heat to 400 degrees F. Bake on the middle rack for 55 minutes. Remove the lid. If
the dough looks well browned and very crusty, it may be done. Test with a
skewer or an instant-read thermometer in the thickest part; if it comes out clean or registers 205-209 degrees, set the
pot on a wire rack and let the bread cool for 5 minutes. If the skewer comes
out sticky or the dough top still looks pale and slightly soft and the temperature
is below the target range, continue baking, uncovered, for 10 to 20 minutes
longer, or until the top is well browned and a skewer inserted in the thickest
part comes out with just a few crumbs on the tip (or until center registers at
least 205 degrees on an instant-read thermometer). If the thermometer is at all
moist or full of crumbs, bake an extra 5 minutes longer to ensure the center is
baked through. Cool in the pan on a wire rack for 10 to 15 minutes. Remove the
loaf to the rack and cool thoroughly. The bread will keep at room temperature
for three days, and may be frozen, airtight, for up to two months.
Another bread you might like–my no-knead whole wheat-bulgur pot boule.
Or perhaps you’re interested in my very popular crusty white pot boule from Kneadlessly Simple.
Or for a complete change of pace, try my kneadless chile-cheese bread loaf. 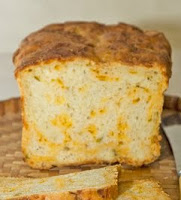



Kneadlessly Simple is a wonderful bread book. If you don't have, ask for it as a Christmas present or go buy it. It's my favorite bread book.
Thanks, it is now my go-to recipe. We like the flavor and the healthfulness, and it really is so fuss-free.
I love the idea of not having to kneed bread! This loaf looks wonderful and your mouthwatering description makes me want some.
I can't do a gluten bread, but it looks fabulous and the seeds could go on a GF bread, too. I love the texture of seeded breads.
Oh my! Believe me, it takes powerful motivation to get me out to the grocery on a cold winter night. But just looking at this loaf makes me think of going out to get some fast rise yeast so I can put this in the oven tomorrow.
I made this loaf last winter. Problem is…it disappears within hours after it comes out of the oven. Magic? (Or bread-love.) Seriously delicious.