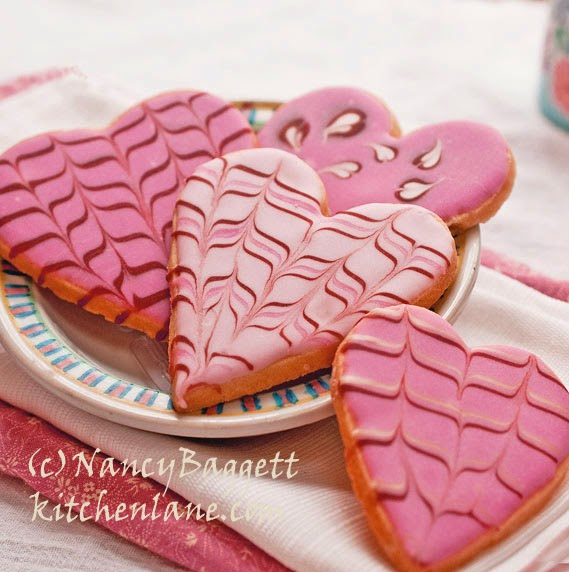
Decorated cutout cookies always seem magical. That’s why so many of us enjoy getting out our stash of cutters and making whatever shapes are right for the season. With just a little time and creativity, we can create edible works of art as pretty as those depicted on holiday cards and wrapping papers.
These days I mostly make cutout cookies with my grandchildren,
Charlie and Lizzie. We started when they were just toddlers, and, in
fact, one of the first sentences Charlie learned to say was, “Nana make
cookies?” For my very popular how-to video showing the super easy dough rolling method we always use, go here.

When baking with my grandkids I often skip the usual petrochemical-based food colors and create icings and even homemade sprinkles with fruit juices and other natural botanical colors instead. (Research has shown that even “government approved” food dyes can cause allergic reactions and hyperactivity in some people, especially children. And allergies run in my family.)
 So, ALL the cookies featured here are completely DYE-FREE. The secret to all the appealing pink shades is pure, frozen (thawed, undiluted) cranberry juice concentrate found in the supermarket frozen juice section! Incidentally, Simply Sensational Cookies (available on line here) has many additional naturally beautiful buttercream frostings, icings, homemade sprinkles and decorating ideas both for Valentine’s cookies and other gorgeous seasonal treats.
As the cookies at the very top and at right above suggest, it’s possible to get really razzle-dazzle results with piping; and it’s easy enough that my grandkids have fun with it. The technique is called marbling, meaning that an accenting color is piped onto a wet layer of a complementary-colored icing, then immediately marbled into it with a toothpick for a dramatic patterned effect. Scroll down below for how-to pics. Or, check out my how-to-marble Youtube video, which shows how use the exact same technique on Christmas cookies.
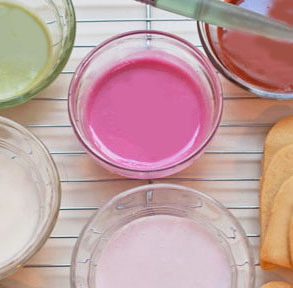
This recipe is designed so you can make smallish batches of 3 or 4 different colors–bright pink, light pink, chocolate and white. (In case you’re wondering about the natural green icing as shown in the bowl in the upper left of the pic just above, check out the green tea recipe here.) All together these batches of icing will yield enough to generously decorate 40 to 60 cookies. Notice how nicely the chocolate and the white contrast with the bright pink.
By the way, I made the cookies using the Good & Easy Sugar Cookies recipe in Simply Sensational Cookies, but for another a rolled sugar cookie recipe that works well, go here. Remember that the following icing quantity makes one color of icing. For every color you want, start with 1¼ cups powder sugar and 1 teaspoon meringue powder and proceed from there.
- 1¼ cups powdered sugar, sifted after measuring if lumpy
- Generous 1 teaspoon commercial meringue powder or dried egg white powder
- 2 to 3 tablespoons unsweetened cocoa powder, sifted after measuring if lumpy, optional for chocolate icing
- 1 teaspoon light corn syrup
- ⅛ teaspoon almond extract or vanilla extract, optional
- About 2½ to 3 tablespoons water, or frozen (thawed) cranberry juice concentrate, as needed for bright pink, pink or white icing
- For each color of icing, thoroughly stir together the sugar and meringue or egg white powder until well combined in a small deep bowl; for a chocolate icing incorporate the cocoa powder also (the maximum will yield the darkest color).
- Add the corn syrup, and extract if using, then gradually stir in enough fruit juice or water (or a combination) to yield a fairly wet, fluid icing.
- Stir until very well blended, adding in more juice (or water) or powdered sugar to produce the color and consistency desired.
- Use the icings immediately or cover and refrigerate for up to a week. Let warm to room temperature before using, then very thoroughly stir in a little juice or water if they are too stiff to spread.
- If simply icing cookies, set them on racks over paper or parchment to catch drips. Then spread the icing over the tops with a table knife; the icing will flow out evenly and dry with a sheen.
- If marbling cookies, also have on hand toothpicks and the accenting colors ready in piping cones; pastry bags fitted with fairly fine writing tips; or in small sturdy baggies with one bottom corner snipped off at the very end. Working quickly before the base layer of icing can set, pipe on the accenting lines as desired, then immediately draw through them to create the marbling desired.
- Let all iced cookies dry for at least several hours and preferably 4 to 6 hours before storing airtight. Pack them in a single layer or with wax paper between each layer. Keep 1 week at room temperature; or frozen airtight for up to 1 month.

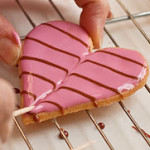

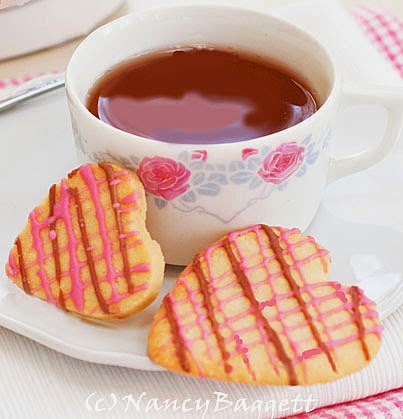
For a simpler decorating technique for Valentine’s Day cookies shown below, go here.
For a whole gallery of my dye-free decorated cookies and pastries, check out my Pinterest board here.

Absolutely gorgeous – just like Martha's!
Cronshi, thanks for the heads-up on Dan Rodricks. I may send him an e-mail mentioning Kneadlessly Simple.
Alli, Toby, Holly, so glad the idea of dye-free appeals to you. And by using cranberry juice concentrate, the colors come out bright and pretty, and there's no work to do (like cooking beets!) Appreciate your recommending my Simply Sensational Cookies to others–or buying a copy to give yourself.
Simply gorgeous! I love the idea of dye-free and want to try this at home. I must get your cookie book. That will be my Valentine's gift to myself!
Amazing cookies! By the way, just heard someone mentioning kneadlessly simple on midday by Dan Rodricks. He remembered your appearance there, by the way, didn't realize you wrote a book on knead-free bread.
What a perfect Valtentine's Day project to do with my granddaughter. So glad we have an alternative to artificial colors, especially since two of my grandchildren are allergic to them.
And I love the marbling effect.
These are beautiful! I love all of the natural flavorings you have in Simply Sensational Cookies. I am a librarian at a medium-size public library in a community that is just beginning to embrace the "whole foods/local/natural" movement, and I've been recommending your book to everyone! All of the recipes I've made turn out to be delicious, and I feel good serving up baked treats made with natural, non-synthetic ingredients to my family, friends, and yes, library patrons. Thank you very much for writing such a lovely book. It is truly one of my favorite cookbooks and I've had quite a few happy library patrons tell me the same. Happy baking!
Thank you both. I taught my grandkids how to do these–they are really not difficult yet look quite fancy I think.
These cookies are gorgeous. And your detailed directions and pictures mean that anybody can make them!
I adore these cookies! So beautiful. And though I suppose I can't include them in my list of "healthy choices" for my diet, serving them to my family I'd feel better. Why not do without the dye?