
Perhaps you never noticed, but really avid cookie decorators tend to be a tad obsessive about their edible artwork. They often go way overboard with the futzing and beautifying, apparently forgetting that their little masterpieces are going to be demolished as soon as the goody plate hits the sideboard!
Yes, I’m including myself in this group, and, yes, there are lots of us around. Witness the vast numbers of how-to cookie videos out there on the Internet. With the precision of a surgeon (and armed with an array of tools to match), hundreds of master crafters wield their cutters, tips, tubes, pastry cones, bags, and scribes, showing how to shape, outline, flood, over-pipe, ripple, ruffle, marble, and swirl. With the fervor of Michelangelo in rare Renaissance form, they dip into myriad colored gels, glazes, frostings, luster dusts, and nonpareils and highlight, shade, burnish, and adorn. (My own rather practical video showing off the easiest/best way to roll out cookie dough is here.)
 The “I’m decorating and I can’t stop!” compulsion and I are intimately familiar. Once, for a special gift, I spent nearly an hour
decorating a single magnificent angel cookie, complete with pearlescent wings, gold-tinged gown and cherubic smile. (When she was completed I was very reluctant to give her away.)
Another time, for a photo shoot, I devoted three hours to turning out
seven glittery, “crystal-” studded Christmas tree ornament cookies. They were so pretty that when we were done I couldn’t bear to
let anyone eat them. I took my bejeweled treasures home and stashed them, carefully wrapped, in the freezer–where they stayed for … twelve years! I’m only admitting this now because last fall I was finally able to make myself throw them away.
Now, despite occasional relapses, I’m gradually recovering from my decorating excesses. I mainly bake cookies with my nine- and ten-year old grandchildren and really try to limit the decorating techniques to ones they can do (such as the wet-on-wet technique on Valentine’s cookies here). These days, I generally skip all the purchased commercial sprinkles, luster dusts, and synthetic food dyes, both to streamline activities and to avoid potential health risks of these iffy ingredients.

Also, my latest cookbook is called Simply Sensational Cookies for a reason: The emphasis is on recipes for those who want great-tasting and good-looking cookies but don’t have fancy decorating supplies, advanced piping skills, or extra time on their hands.
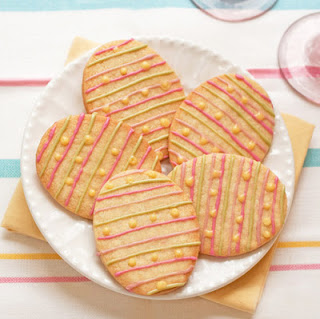
Which brings me to the accent piping technique spotlighted here. For the cookie maker who’s willing to go a small step beyond just throwing some colored sugar on their cookies before baking, it’s a super option.
Look closely at the pics in this post and you’ll see that it’s possible to achieve a variety of eye-catching results with a few colorful dots, zig-zags and lines. If you arrange all the cookies spaced slightly apart on a rack (set over paper to catch drips) and just drizzle icing back and forth, you can embellish a whole batch in just a few minutes. A parchment piping cone or pasty bag with a writing tip do deliver the best results, but for wavy lines and quick zig-zags a sturdy baggie with one corner snipped off will do.
- 1 cup confectioners’ sugar, sifted after measuring, if lumpy, plus more if needed
- 1½ teaspoons commercial meringue powder or pure dried egg white powder
- 1 to 4 teaspoons unsweetened natural cocoa powder or Dutch process cocoa powder, sifted after measuring, if lumpy (optional)
- ½ teaspoon light corn syrup
- 2 tablespoons frozen (defrosted) cranberry, orange, Concord grape, raspberry-white grape or cherry-grape juice concentrate (or a combination), plus more as needed
- For each color of icing you want to make, vigorously stir together the confectioners’ sugar and the meringue powder, if using, in a small, deep bowl.
- Stir in the corn syrup.
- Add the juice concentrate (or a blend of concentrates) and stir until completely smooth.
- If a brown color or tint is desired, stir in cocoa powder as needed. You want a uniformly colored icing that’s thin enough to pipe but thick enough not to run. Adjust the consistency as needed by adding confectioners’ sugar or juice or water, stirring to combine thoroughly.
- To pipe on the accents, spoon each icing into a small cone of parchment paper with just the tip of the pointed end snipped off, or piping bag with a medium writing tip; or into a plastic food storage bag with the tip of one corner snipped off. (Don’t fill a bag or cone more than half full.) Mix and match the colors and pipe whatever accents are desired.
Tip: The icings can be refrigerated airtight in nonreactive containers for up to 1 week; let return to room temperature before using. If they have thickened, thin with water, stirred in very thoroughly.
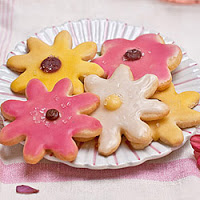
Another easy, dye-free decorating technique for daisy cookies is here.
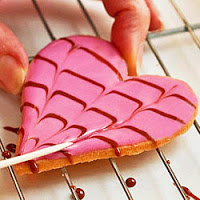
Or check out the Valentine’s cookies how-to here.


I think you'll be happy with this approach. Good luck!
I had to pin this. I have been trying to find my way around artificial coloring.
Flora, you are right! I don't know why I didn't think of it before myself! I know that some folks who want to avoid food dyes use beets and spices like turmeric–but really they don't taste very good while the fruit juices actually add nice flavor to the icings. The dye-free icings are featured in my Simply Sensational Cookies book.
When we see such simple and clever ideas, like coloring icing with juice concentrate, we wonder how come we didn't think of it before!
Thanks for sharing.