 If I had to choose my favorite fall flavor pairing, it would be fresh apples and caramel. Preferably strewn with a little coarse salt and lightly toasted pecans, and maybe even topped with a little scoop of ice cream. The interplay of crisp, tart, sweet, smooth, crystalline, nutty, fruity, and gooey creates a wonderfully complex yet earthy, homespun taste experience. Just thinking about it is making me want to get an apple and the last serving of caramel from the fridge and start snacking now! (BTW, experts say that apples should always be stored in the refrigerator, otherwise they will lose their crispness and fresh picked taste.)
American confectioners have been dipping whole apples into caramel and creating those irresistible apple-on-a-stick treats for decades. In the last thirty years, they’ve taken to finishing their pops by rolling them in toasted nuts, especially pecans—which have a sweet earthy flavor and crunch that complements both apples and caramel perfectly. Lately, as the salted caramel craze has taken hold, some gourmet shops have begun sprinkling their caramel apples with crystal salt as well—a touch my grandkids don’t care for but that the family’s “growmups” (as my granddaughter used to call us) love.

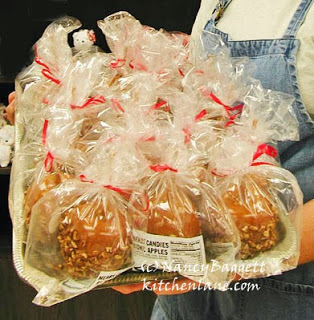
A number of years ago, when I was researching recipes for my All-American Dessert Book, I came upon some highly memorable caramel apples at Merb’s, a locally famous confectionary shop in St. Louis. Since the 1970s, when the Granny Smith apples ripen in fall, Merb’s orders the super-huge ones and starts cranking out big batches of caramel. Then, until the end of October, they dip, twirl, garnish, and dispense about 2,000 “Bionic,” apples a day. That’s a fresh batch being set out in the pic at right. The goodies are called bionic because, including the layer of glossy caramel and generous studding of pecans, each one tips the scales at least a pound and contains about 600 calories!
It actually took me three separate sessions to eat my humongous Merb’s apple, so when I created caramel apples for The All-American Dessert Book, I deliberately choose to use smallish and medium-size apples instead. I did try to accurately recreate Merb’s wonderfully succulent caramel recipe though, and I think mine is very close. In fact, it might be even better!
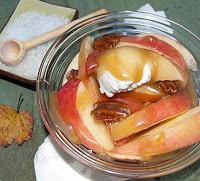
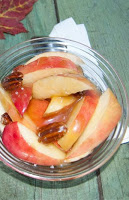
Lately, I’ve been focusing on ways to simplify favorite recipes. So instead of dipping the apples I just slice fresh, tangy apples into bowls and drizzle the buttery caramel sauce over top. I set out salt and pecans so diners can garnish servings to suit themselves. This works just great! The approach not only means the caramel doesn’t have to be cooked to exactly the right temperature to cling to the whole apples, but that it can be prepared well ahead and reheated. Plus, the apples can be sliced as needed and in whatever quantity desired. This quite frankly, makes a spectacular, yet effortless autumn treat.
Another possibility: Top my microwave-baked apples with scoops of ice cream and then some of this caramel. Or you could gild the lily and drizzle some over my apple crisp.
 Ooey-Gooey Caramel Sauce for Apples
As from scratch caramel recipes go, this one is super easy: The sugar doesn’t have to be boiled to the dark caramel stage with water first, which eliminates the risk of having it overcook and turn bitter or black. And it’s a simple matter to adjust the final consistency: Just test the caramel with a slice of chilled apple and if it’s too stiff stir in a little warm water until it is the desired consistency. By the way, the caramel sauce is yummy drizzled over my microwave-baked apples, too.
It’s important to use apples that are crisp and at least slightly tangy, as they balance the sweetness and silky texture of the caramel best. I used honey crisp here. I like to garnish the servings with sea salt crystals and lightly toasted pecans, but this is entirely optional.
1 1/3 cups heavy (whipping) cream
2/3 cups granulated sugar
2/3 cups packed light brown sugar
1 cup dark corn syrup
1/8 teaspoon salt
5 1/2 tablespoons unsalted butter, cut into chunks
1 1/2 teaspoons vanilla extract combined with 2 teaspoons water
Thoroughly stir together the cream, granulated and brown sugars, corn syrup and salt in a heavy 4-quart saucepan or pot. Add the butter. Bring to a boil over medium-high heat, stirring constantly with a long-handled wooden spoon. When the mixture is boiling briskly, wipe any sugar from the pan sides using a pastry brush dipped in warm water (or use a damp paper towel). Wash off the stirring spoon.
Adjust the heat so the mixture boils briskly, and cook, occasionally stirring and scraping the pan bottom. As the mixture starts to thicken and turn the color of rich medium-dark caramel candies stir more frequently; cook at least 7 and up to 8 minutes. Remove from the heat. Gently stir in the vanilla-water mixture until evenly incorporated. Test the caramel consistency by dipping a chilled apple slice into the caramel. Let stand until the caramel is cool to the touch, then eat the slice. If the caramel is too stiff and hard to chew, thoroughly stir in 2 teaspoons more water and repeat the test. Continue until the desired consistency is reached (or until you are tired of snacking!).
Use the caramel immediately or refrigerate for up to 10 days. Rewarm on low power in a microwave oven; stir and check the consistency every 30 seconds as the caramel should not be heated to a boil again. If the caramel has stiffened too much during storage, thin it to the desired fluid consistency by thoroughly stirring in a little warm water.
Spoon the warm caramel over the apple slices. Garnish with lightly toasted pecans and coarse salt, if desired.
Makes a generous 2-cups sauce, enough for 8 to 10 servings.

Yes, you can thin it–using hot water would be okay, too.
Can you thin the sauce later by adding a little more cream or milk?w
Can't get much better than homemade carmel.Looks s-o-o good I'll have to try this.