In case you haven’t already guessed, I’m cookie obsessed. I’ve been making and decorating cookies ever since I was a child. For several decades now, every holiday I come up with a fresh new look and collection.
My aim is cookies eye-catching enough to stand out and create a stir (and, of course, that taste as good as they look). I want people to ooh and aah and comment (just before they take a bite), “This is really too pretty to eat!”
Using an assortment of decorating techniques, over the years I’ve made a goodly number of cookies that have elicited this kind of response: Stained glass stars and Christmas trees (more on the stained glass method here), sparkling iced snowflakes in a variety of sizes, and “painted” springerle, are just some of the most memorable ones.
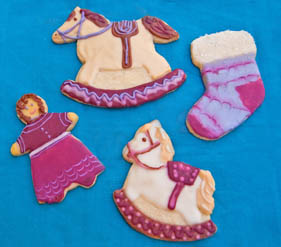
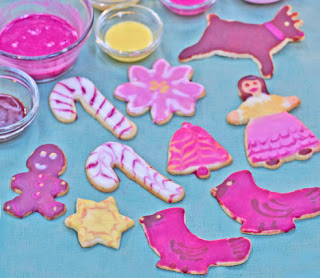
Interestingly, the desired pizazz with sugar cookies doesn’t generally come from relying on fancy, hard-to-find cutters, or in using a lot of decorator sprinkles. And usually not from adding elaborate piped details either, although the rocking horses and dollie cookie at left did require a good bit of piping.
But, since I don’t work in a bakery or decorate baked goods all day long, piping isn’t my forte, and often, I just brush on icing details (like the stocking heel and toe, left) with a small artist’s brush. (If you’re decorating with children, note that they are also particularly comfortable applying icing with a brush.) Although my kitchen contains a lot of cutters (I just bought a canister containing 20 holiday shapes for $5!) and I have many kinds of sprinkles, these don’t actually get used much. The stocking cookie, which is accented with clear crystal sugar, is the only one here sporting any sprinkles at all.
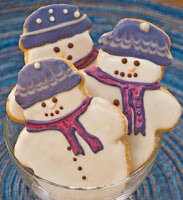 Instead, the key to truly eye-catching iced sugar cookies is simply to avoid the traditional (make that ho-hum) bright red and green Christmas colors, and rely on a fresher, less familiar palette. If you look carefully at all the cookies here, you’ll see that they’re readied from about six complementary custom-blended royal frosting colors that are mixed and matched in various ways. Tip: The brown hue is created by stirring a little sifted unsweetened cocoa powder into a red or yellow shade.
Even if you prefer to stick with the more conventional red-green holiday scheme, it’s easy to update the look just by mixing up, say, a more interesting evergreen or lime shade by adding a drop of blue or yellow into the usual green, and a less predictable purple red by tinting it with a drop of blue. And remember that for real wow power, you need to employ an array of at least four or five colors, not just a couple of shades.
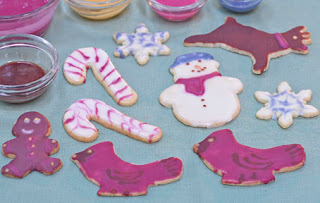 One more technique that you see here and can readily copy is the decorative scalloped effect shown on the snowmen’s hats above left, on the lower candy cane and snowflakes right, and bell, star and dollie pictured at the top. It’s called marbling and involves nothing more than piping a straight line or circle of contrasting icing onto a layer of still-wet base layer of icing, then drawing a toothpick through the piped lines to produce ripples. For more how-to details and examples of the marbling technique, go here. For a good all-purpose sugar cookie dough, go here.
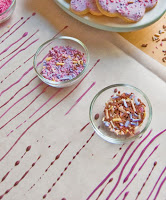
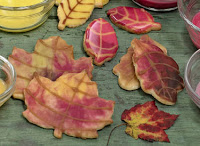
For more inspiration on coming up with striking color palettes and achieving beautiful results such as the painted sugar cookie leaves below, check out my post on pumpkin and leaf cookies here. Or check out how to make your own custom-color cookie and cake sprinkles here.

Hi Stephanie, thanks! Have fun with your decorating. My grandkids are coming tomorrow for a cookie decorating session–can't wait.
Gorgeous cookies! And tips from the pro… thank you!
Cookies look great–will be trying this.