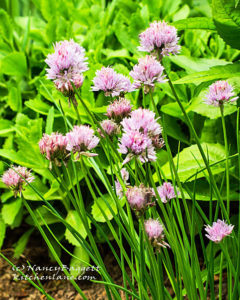
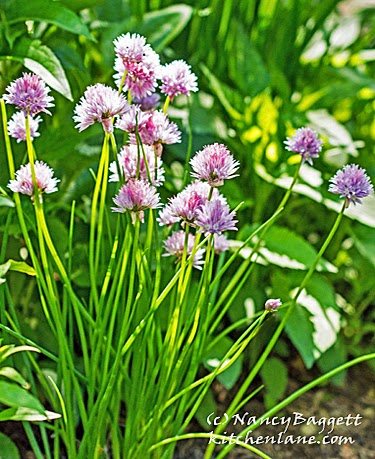
Even if you have never grown a single edible plant; don’t have a garden plot; and fervently believe you have a brown thumb, if you enjoy cooking and eating fresh, flavorful produce, you should absolutely, positively try growing some chives. Here are just several good reasons:
 |
| Chopped fresh chives enhance most potato soups. |
Chives, members of the onion family called Allium schoenoprasum, are the most versatile and rewarding of all culinary herbs. They can add zip to any cooked or uncooked dishes that benefit from a mild onion or green onion flavor. I use my chives from April to November, routinely tossing them into or onto soups, stews, salads, dips, vegetable dishes, and entrees to enhance both taste and appearance. (The recipe for the very tempting potato-herb soup shown at right is posted here.)
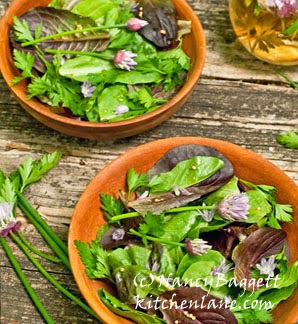 |
| Toss chive blooms into almost any salad. |
Harvesting chives involves only cutting across the thin, hollow reed-like leaves about an inch above the ground. Because chive blades are ready as is (no peeling or trimming needed), they are much handier for cooking than onions and green onions. Simply wash them under running water, then either snip them into confetti-like bits with kitchen shears or finely chop them crosswise with a sharp knife. (After harvesting, let the leaves grow back to normal height before cutting again.)
2. Chives are hardy, unfussy plants that grow well both in pots and in the ground. Even if you think you have a brown thumb, they are likely to survive, even thrive! If planting your chives in a pot, choose an 8- to 10-inch or larger diameter container; be sure it has adequate drainage holes. Place in any sunny spot–balconies, decks, stoops, bright porches, or window boxes are all suitable locations. Chives do need rich, but slightly sandy soil that won’t get waterlogged, and they like at least 6 hours of sun daily to flourish.
The plants are equally happy tucked into a semi-sunny or sunny garden, and since they remain in small inconspicuous clumps they will fit in even in small plots and in communities where vegetable patches aren’t allowed. Chives grown in pots need watering whenever the dirt becomes dry; unless the weather is extremely hot and the land arid, those put directly in the ground are usually maintenance free once established.
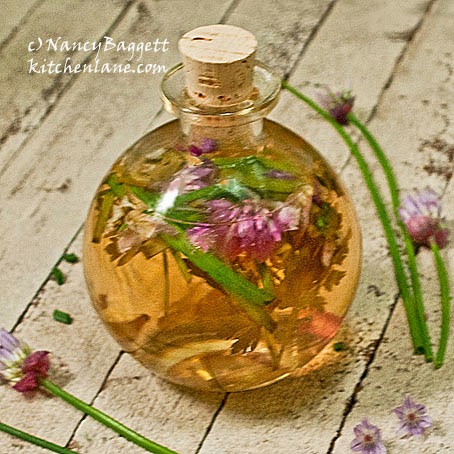 |
| Add chive blooms to chive vinegar. |
3. Being very hardy perennials, chives will come up and provide a crop year after year with virtually no effort from you whatsoever. (In extremely harsh climates, those grown in containers are best planted in Styrofoam-based pots that insulate their roots from the bitter cold.) Unlike parsley, which always dies out after two years and has to be replenished, chives can be considered a permanent addition to a kitchen garden. Unlike mints, which can run wild and take over a whole yard, chives are well-mannered and stay right where you put them. If your chives seem to dwindle after a few years, just transfer them to a larger pot with fresh potting soil. Or, divide your garden clump into several plants and space them in fresh soil a bit apart to reinvigorate them and increase their number.
 |
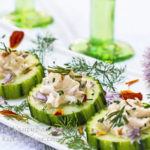
| Purple chive bloomlets garnish canapes. |
4. One of the great bonuses of growing your own chives is that they produce flowers that are entirely edible and that make enticing garnishes. Each season, usually in May or June, the plants send up buds which open into feathery purple blooms. These are lovely plucked from their stems and tucked into savory and eye-catching bottles of seasoned rice vinegar, as pictured above right; a recipe for herb vinegar (great for making a vinaigrette) is here.
But the flower heads actually contain a group of small bell-shaped bloomlets, and these can be separated and add a charming floral touch and pizazz to all sorts of dishes. Sprinkle them over sliced tomatoes or cucumbers or cooked vegetables such as green beans or carrots. Or for a special occasion, strategically place them on canapes, pictured above left, or use them to decorate a cheddar-chives cheese ball like the one shown just below here. (By the way, the flowers are the parts that produce the seeds, and, occasionally, if you leave the flowers on the plants instead of harvesting them, the seeds that drop will actually produce new baby chives the next spring.)

Easy Cheddar-Cream Cheese Ball with Fresh Chives
If you ready the cheese ball with white cheddar and add chives into the mixture, it will be cream-colored and flecked with green inside and out. For a ball like the one pictured here, omit the chives when readying the cheese mixture and use a brightly-hued sharp cheddar.
This cheese ball is both really simple to make and very, very good. I’ve found that guests keep coming back and nibbling until it’s completely gone—they apparently find the homemade a lot tastier than the usual store-bought! The secret is in using a good-quality sharp cheddar and fresh chives. Dried chives just won’t do.
Should you be lucky enough to have some chives blooms at hand, you can create the memorable, eye-catching look shown in the photo here. Just snip the chive bloomlets from the flower heads and press them into the surface of the ball as desired. In case you’re curious, the bell-shaped bloomlets are tender and taste just like the green chopped chive blades.
1 8-ounce package regular cream cheese or Neufchatel cream cheese (not tub-style spread), cut in chunks and at room temperature
4-ounces quality white or yellow extra-sharp cheddar, chopped in 1-inch pieces and at room temperature
1/2 to 1 teaspoon Sriracha hot chili sauce to taste or 2 or 3 dashes hot pepper sauce, optional
1/8 teaspoon onion powder or onion salt
3 to 4 tablespoons chopped fresh chives
2 to 3 tablespoons fresh chive bloomlets, optional
Combine the cream cheese, cheddar, sriracha or pepper sauce if using, and onion powder in a heavy medium-sized non-reactive saucepan. Place over medium-low heat and cook, stirring constantly to avoid burning, until the cheeses melt and the mixture is completely smooth; as necessary lower the heat to prevent scorching. Remove from the heat and let stand to cool 10 minutes. Then, if desired, stir in up to 2 tablespoons chives until evenly incorporated.
Scrape out the cheese mixture onto a large sheet of plastic wrap and pull the wrap up smoothly around the cheese to form a rough ball. Refrigerate with the wrap tucked underneath to hold it in place until the cheese ball is chilled and firm enough to shape more fully, at least 1 hour and up to several days.
Using a fresh sheet of non-stick spray coated plastic wrap shape the cheese into a smooth, even ball. Roll the ball in chopped chives; if adding chive bloomlets, coat the surface evenly but not heavily with the chopped chives, otherwise coat the ball fairly heavily all over. Press the bloomlets into the top and sides of the ball, as desired. Cover the ball loosely and refrigerate for up to several days, or serve immediately
along with regular or gluten-free crackers. Makes 1 12-ounce cheese ball.

It is really interesting, I hope everybody lick this Post.
This is really nice topic, which is very useful for me.
This makes me want to grow chives and that's a big deal if you knew me. We did have some growing in our old apartment where we had window boxes but we don't even have that here. I can't want for a house with a garden. And I'm loving that cheese ball!
Yes, absolutely. Like using green onions, only easier! And when you have blooms, prettier!
Thanks for the great article, Nancy. I had just noticed that the chives I had planted last year came up again. So now I have some recipes to try.
Cronshi, for years I never knew I could use the blooms either. Now I'm always sad there aren't more blooms! And yes, even after an awful winter all my chives came back.
In the horror film of my winter torn herb garden, my chives were among the sole survivors of the deep snows. They came up in purple splendor this spring. Great herb and I love the idea of using the flowers. Never knew I could.
I do love having chives. One thing–they do need sun. I had some in front, up by the sidewalk–the sunniest part of the front yard. They didn't do well, and I moved the clumps out back, where they are doing very well. Mint will grow where the chives wouldn't out front. I like having perennial herbs that come back year after year.
That's exactly what I wanted–to convince peeps to try chives. I grow a variety, but chives are the ones that deliver me the most eating pleasure for the amount of effort spent.
Wow! So many good ideas… I've never been particularly fascinated with chives. Basil, cilantro, oregano–yes. But not chives. Now I'm reconsidering. I think there's still a little room in the garden!