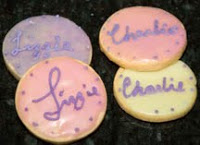
 Sugar cookies, gingerbread and other rolled cookies can be quickly decorated with a a few colored sprinkles, a zig-zag of drizzled icing or more elaborate piping. (Writing looks quite simple, but practice piping on wax paper first. And unless the cookies are fairly large, add only initials or short names!) Icing in an array of colors can also be painted on as shown on the summer daisy cookies below and here. For another great look, see my “painted” autumn maple leaf cookies here .
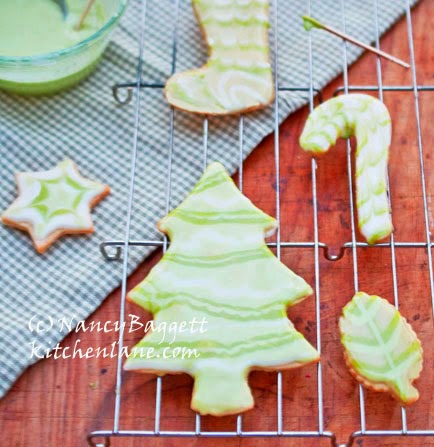
One of my favorite decorating techniques is called marbling as shown on the holiday cookies at the very top; I have a quick Youtube video that shows how to marble here. See how to do marbling and get the icing for the holiday cookies at the top here or check outmy pretty marbled Valentine’s Day heart cookies here. 
Another entirely different, very eye-catching look can be achieved by creating stained glass cookies. Below are a couple more handy techniques I like. The following info comes from the big decorating chapter of my All-American Cookie Book.
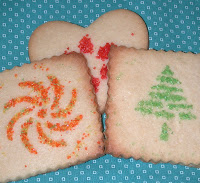 Dry Stenciling Stenciling is done on unbaked cookies with a dry material such as fine crystal sugar, homemade colored granulated sugar, or cocoa powder. The technique involves masking some portion of a smooth, flat, unbaked cookie top by covering it with a handmade decorative cutout (for example, a Christmas tree, heart, bell, etc.), round cookie press disc, or even simple paper strips. Then, the exposed dough surface is dusted with the stenciling material, and the cookie is baked. During baking, the dusting material becomes embedded and so stays in place.
Faux Etching This technique gives rolled-out cookies an interesting etched or engraved look, but involves no real etching. All you need are several sizes of cookie cutters and an eye for putting together complementary shapes. For example, attractive looks can be achieved by pressing down and imprinting the outline of almost any smaller shape—from geometric forms and alphabet letters to animals, birds, flowers, etc.,—onto a larger round, fluted, or oval cookie. For more elaborate looks, use sets of nested cutters such as hearts, stars, or petals “etched” with progressively smaller hearts, stars, or petals. Or mix and match by “etching” with a succession of different but complementary shapes, such as a tiny heart inside a petal, inside a slightly larger heart on a scalloped cookie.
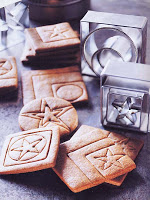 “Etched” designs look best on doughs that contain only small to moderate amounts of baking soda or baking powder and, thus, don’t puff up excessively and blur the etched lines. Ready unbaked cut-out cookies for etching by placing them on sheets for baking. Center the cookie cutter used for the etching on the larger cookie. Press down firmly enough to imprint the shape of the cutter into the dough but not so firmly that you cut completely through it. If imprinting with a series of cutters to create an elaborate design, simply repeat with successively smaller cutters until the surface area is filled.
Color Wash The details highlighted on stamped, molded, or even “etched” shortbread and pale-colored sugar cookies such as springerle can be easily enhanced by adding a food color wash to whatever features are desired after the cookies are baked. For example, leaves and flowers could be colored with green and pink and stars with yellow. This pic is from the http://www.thespringerlebaker.com/ ; it shows just how gorgeous the color wash technique can be.
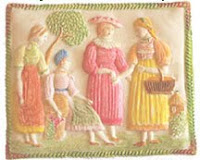 Ready a wash simply by adding a drop or two of the desired color in a few teaspoons of water. Make as many different colored washes as desired. Using a small clean artist’s paint brush, test each color on a broken cookie to see how each shade looks before applying it. Lightly apply the wash over very fine details using small artist’s brushes and over larger detail areas using a small pastry brush. Let the colored cookies thoroughly dry before storing them.

Leave a Reply