 I just made my own cookie and cake decorating sprinkles to use on cookies, cakes, and other sweet treats. And you can, too!
They are easy, economical, taste much better than store-bought, and you can ready homemade decorator sprinkles in absolutely any custom shade desired. An important added benefit for me personally is that by readying homemade decorating sprinkles I can avoid giving my grandkids decors laden with synthetic food dyes. During a family cookie decorating session, they snitched a lot of sprinkles, all free of commercial synthetic dyes. Do note that these sprinkles are only suitable for adding after baking–on top of iced cookies, or frosted cupcakes, or cakes. They will burn if added to cookies before they go in the oven.
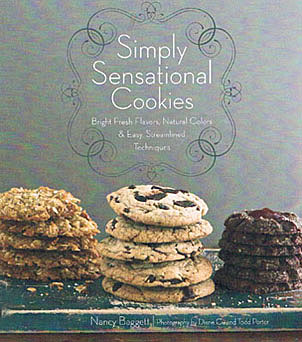 Since some research suggests that these may cause hyperactivity or allergic reactions in certain children, I feel more comfortable tinting my sprinkles using au natural food colorings made from only fruit, berry, and veggie-based colorants, and occasionally, cocoa powder. (For my “au natural” buttercream frosting, go here.) If the idea of au naturel decorating appeals to you, do keep an eye out for my soon-to-be-published Simply Sensational Cookies book, which will feature a whole host of synthetic dye-free cookie decorations and garnishes. Check out details here.
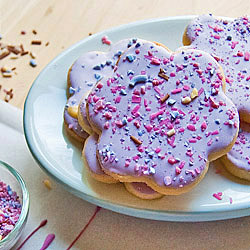
Often, I just use the dribs and drabs of whatever powdered sugar frostings are left over from decorating projects, such as my marathon decorating day featuring the eye-catching cookies shown here. To do this yourself, simply follow the piping, drying, and chopping instructions below.

But it’s easy to mix up a batch of icing specifically for preparing sprinkles using the recipe here. The ingredients are just quickly stirred together–no mixer or beating required. The sprinkles are then piped; let them stand until dry before chopping them into sprinkle-sized bits.
For au naturel sprinkles in pastel shades, any fruit juices you have in the refrigerator will do–cranberry, Concord grape, cherry, raspberry or orange juice will all add a touch of color and a light, pleasing taste. If avoiding synthetic dyes matters to you, check the labels to be sure the juices you buy are actually free of Red 40, and Yellow 5 or 6 and other petroleum derived products. If you don’t consider commercial dyes a big issue, tint the icing for your sprinkles with regular food colors, as desired.
For brighter completely au natural hues, it’s possible to buy botanically-based colorants on-line and in some specialty stores.
Note that unlike the ordinary synthetic food dyes, these plant-based colors will fade a little over time. And, depending on the hue, the colors may not be as intense as the synthetic dyes–but I think that makes them look more natural and appealing.
Most important of all–some botanically-based dyes will change color in the presence of acids from fruit juices. So before you add them to a whole batch of frosting, add a drop to a small amount of it to see if you like the color created. Blue-hued natural dyes are particularly prone to changing color when blended with fruit juice–usually to a very pretty shade of pink. So, if you’re really yearning for a blue frosting, use plain water instead of fruit juice in the recipe.
Homemade Sprinkles
 For multicolored nonpareils, you can pipe the various shades onto one sheet of parchment as shown in these pics. For individual colors, pipe each color onto a separate sheet and chop and store them separately. The recipe may be doubled, or even tripled if you wish, but the sprinkles are best used within 6 months. Note that homemade sprinkles are best to add over frostings and icings or to top sugar cookies that require fairly short baking times. Exposure to heat for longer than about 10 minutes causes the natural colors to fade.
By the way, both the icings and sprinkles shown in this post feature only botanically-based colors. Which proves that you can decorate with pizzazz and avoid health risks, too.
Tip: My tried and true sugar cookie dough used to prepare the cookies shown is here.
1/2 cup powdered sugar, plus more if needed
1 to 2 teaspoons unsweetened cocoa powder, sifted if lumpy, optional
2 to 3 teaspoons cranberry, grape, cherry, raspberry, or orange fruit juice or water, plus more as needed
Several drops of regular or au naturel (botanically-based) commercial food colors, optional
Put the sugar in a small, deep bowl. (Or to make sprinkles in two colors, use two bowls.) If preparing cocoa jimmies, thoroughly stir in the cocoa powder; a larger amount will yield a deeper color and flavor. Gradually and thoroughly stir in enough juice or water to create an icing that is smooth and stiff enough to pipe. If desired, stir in a drop or two of food color for a brighter shade.

Lay out a long sheet of parchment. Spoon the icing into a pastry bag fitted with a fine writing tip; or into a parchment piping cone (as shown at left); or into a sturdy plastic baggie. Snip a tiny opening in the piping cone tip or one corner of the baggie.
Pipe slightly spaced, thin vertical lines of icing onto the parchment; as the pic at left shows, it’s okay if the lines aren’t perfect. Let the lines dry uncovered at least 15 hours in dry weather and 24 hours in damp or humid weather.
Slide the parchment and piped lines onto a cutting board and using a large knife, cut across the lines to create jimmies or dots as desired. (Or use a pizza cutter.) If the sprinkles don’t seem completely dry, let stand several hours to dry further. Use immediately or store airtight in a cool spot away from bright light for up to 6 months.
Makes about 1/2 cup sprinkles.
For more on “naturally beautiful” decorating with botanical food colors such as on the hearts go here.

For a round-up other cookie decorating techniques such as the one shown on the daisy cookies below, go here.


I haven't tried to make my own sprinkles with your recipe yet, but I plan to soon. My husband has life-threatening allergies to all nuts and products derived from nuts.I love to bake and decorate, but all of the sprinkles we have found in stores are processed around nuts. Thank you for sharing this! I'm so glad I will be able to prepare my husband's favorite treats safely.
Great idea to use a pizza wheel instead of a knife! Thanks for sharing this tip–I've added it to the recipe.
I put the parchment on my big cutting board and used a pizza wheel to cut them up. Don't press, just roll it along; you don't want to cut the paper.
Barbara Jackie, thanks for your comments. When I saw how many sprinkles and how much icing my grandkids were snitching when we baked and decorated cookies this holiday, I was really happy I'd used natural colors. And yes, the homemade sprinkles are amazingly inexpensive and you can make them in any color desired.
What a wonderful idea, & they will pair up wonderfully with your All natural buttercream frosting. I have tried to limit the use of artificial flavours & colours for years. I will be making these up in several colours.
I use beet juice to give raw sugar crystals a delicate pink colour.
I have just borrowed Kneadlessly Simple from the library & can't wait to try many of the bread recipes. I love your website. Thank you for sharing all your terrific ideas.
Such a fabulous idea. Make me wonder why sprinkles cost so much. Wishing you a new year filled with all your favorite things.
Absolutely excellent! I wish I would have found this earlier today but I haven't had much time for web cruising lately.
BTW I just picked up your Kneadlessly Simple book and will be doing a review after the Holidays. Have a Blessed Christmas – Libby
Hey, thanks Flora! Aside from the fact that I really like controlling what goes in what I feed my family, I like the fact that I can make sprinkles in any custom color desired and very inexpensively at that.
GENIUS! I got to try that!
To be honest, I'm not really too decorative in my baking, but I just loved the idea.
Many thanks for sharing!
🙂