 About six years ago, out of the blue I got a phone call from someone who identified himself as James Baggett. “I’m not calling you because we’re related–we’re not!” he said. “I’m calling because I’m a magazine editor and want you to write a cookie article for me.”
James is the editor of the popular Country Gardens magazine, and the story he had in mind was a “summer cookie party in the garden.” As we
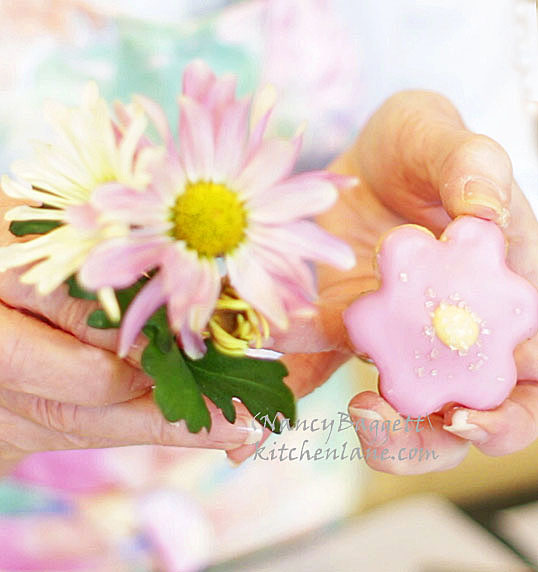
 chatted, I suggested that we feature my grandchildren and me making and decorating the cookies together, then enjoying eating them out in a shady spot in the yard. (That’s Lizzie and Charlie on a bench happily scarfing some of the painted daisy cookies we made in the pic below left.) For more about the story that Country Gardens published go here.
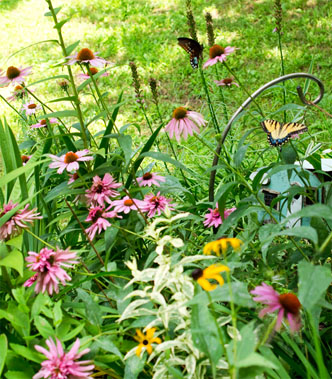
To play up the garden theme even further, I suggested using the colors
and shapes of the cheerful cone flowers, daisies, and black-eyed-Susans growing my own flower beds when devising the cut-out sugar cookies for the piece. Later, while experimenting, I went a even a step further and decided to
create the icings from only naturally beautiful botanical colors, not
the little supermarket bottles of synthetic petrochemical food dyes that
are often used.
The yellow black-eyed-Susan icing takes its color from frozen orange juice
concentrate instead of water; the light pink and bright pink cone flower
icings are tinted with
raspberry-white grape juce concentrate and cranberry juice concentrate.
(Simply thaw the frozen concentrates, then use them straight from the can.) The icing for dark centers or eyes of the cookies is tinted with cocoa powder. If you’re interested in seeing exactly how to easy it is to ice the cookies, check out my YouTube video here.

 For more info/resources/options
for how and why you might want to decorate the “au naturel” way, you’ll
find a whole big chapter with inspiring photos in my latest cookbook, Simply Sensational Cookies. Or for
another post on dye-free decorating on my site, go here. Also, I have a
particular way that works best for prefer rolling out dough for sugar
cookies like these; check out my short, fun how-to video here.
If you have a favorite sugar cookie dough recipe that’s not too sweet you can use it; or try the very good one in Simply Sensational Cookies. Another option–the tried-and-true vanilla dough recipe posted here.
Au Naturel Dye-Free Painted Daisy Cookie Icing
 I like this icing because it not only avoids food dyes, but is easy, spreads
smoothly, and has a slight sheen. It also tastes really good! For another au naturel icing that
gives you green shades, check out my green tea icing recipe here.
The recipe makes enough to decorate 4 to 5 dozen 2 3/4 to 3-inch
cookies. Since it is sweet, add just enough to fully cover each cookie; don’t
pile it on.
The recipe calls for meringue powder or egg white powder. Wilton makes a
meringue powder usually stocked with cake decorating supplies. Some
supermarket baking sections include dry unflavored egg white powder. If you can’t
find either, you may leave it out but it does help set the colors and keep them from fading.
It’s best to use a not-too-sweet, not-too puffy sugar cookie dough such as my recipe here.
If you don’t have an actual daisy cutter, it’s fine to use a simpler petal or
flower cutter, which is not only easier to find but also easier to work
with. To cut out cookies using a fancy grooved daisy cutter, check out my video here as it shows how to keep the dough from catching in the “petals.”
Tip: I don’t call for it below, but you can also make a natural purple-red color color (at the left edge of the pic above) using Concord grape juice concentrate.Or you can make paler shades of any of these colors by using part fruit juice concentrate and part water.

4 1/2 cups powdered sugar, divided, plus more as needed
41/2 teaspoons meringue powder or egg white powder, divided
1 1/4 teaspoons light corn syrup, divided
1 1/4 teaspoona vanilla extract, divided
1 to 1 1/2 tablespoons thawed orange juice concentrate, plus more if needed
1 to 1 1/2 tablespoons thawed cranberry juice concentrate, plus more if needed
1 to 1/2 tablespoons thawed raspberry-white grape juice concentrate, plus more if needed
1 to 2 teaspoons unsweetened cocoa powder, plus more if needed
Turbinado sugar or white crystal sugar for optional garnish
Stir together 1 cup powdered sugar and 1 teaspoon meringue powder in
each of 4 bowls, then stir together 1/2 cup powdered sugar 1/2
teaspoon meringue powder and cocoa powder in a smaller fifth bowl. Add
1/4 teaspoon each corn syrup and 1/4 teaspoon vanilla to each bowl. To
the first bowl, add 1 to 1 1/2 tablespoons thawed orange juice
concentrate; to the second bowl, add 1 to 1 1/2 tablespoons cranberry
juice concentrate, to the third 1 to 1 1/2 raspberry-grape concentrate, and to the fourth bowl plain water. Stir each
icing until thoroughly blended and smooth, adding in little more juice
or water if too dry to mix together. To the bowl with the cocoa, stir in just
enough water to create a spreading consistency. Add more powdered sugar
if needed to stiffen the icings to a slightly fluid and spreadable, but
not runny consistency.
To decorate the cookies: Using a table knife, spread a light, smooth
coating of white, yellow, pink, or bright pink icing over the cookies until all are
decorated. Let stand until set, about 15-20 minutes. Put the cocoa and
yellow icings into sturdy baggies with a small hole clipped from one
corner; or if preferred, use a disposable plastic piping bag. Then
squeeze out small portions of either the yellow or chocolate to form
“eyes” in center tops of the cookies as shown at left. Immediately
sprinkle a little coarse sugar over the “eyes” to add texture, if
desired.
Let the cookies stand at least 2 hours until the icing sets. Then pack,
airtight, preferably in one layer or with wax paper between the layers.
They will keep for 10 days. Or freeze up to 1 month.
 For my food-color-free buttercream frosting recipe, go here.

This is a great idea. Don't like using food dyes.