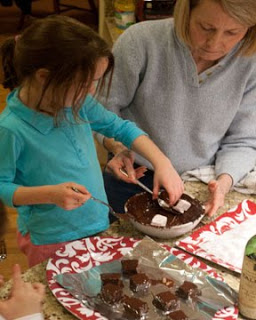
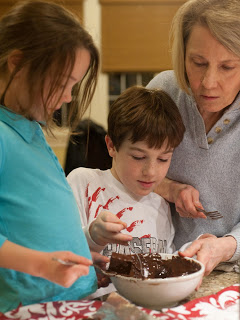
 I’ve been in a pepperminty mood this holiday season, so I made not only the chocolate-peppermint bark presented in the last blog post and some peppermint brownies, but these yummy marshmallows, which are featured, along with my fudge and truffles, in the Washington Post food section today. Modestly, I have to tell you, the marshmallows are delectable. After my grandkids and I dipped them–which they thought was great fun–we served them for dessert: The whole family swooned.
Peppermint Marshmallows
Marshmallows aren’t tricky to make, and they taste so much better than store-bought. These are light, moist and fluffy-soft, and often a hit even with those who don’t normally care for marshmallows. 
These marshmallows depend on crushed peppermint candies for their mild, pleasing minty taste and pale pink color. Don’t try to boost the mint intensity by adding peppermint extract; the flavor will be harsh and unpleasant. However, if you have oil of peppermint (sometimes available in stores with cake- and candymaking supplies) and want a more pronounced menthol character, add a few drops of the oil; don’t add more, as it’s quite potent.
Plan ahead, giving the marshmallow slab at least 6 hours to set up before cutting. Otherwise, it might be sticky and hard to work with. A sturdy stand mixer makes the mixing process much faster and easier, although a very good portable mixer can be used if necessary. Crush the peppermint hard candies by putting them in a triple thickness of small plastic food storage bags; seal, then pound with a kitchen mallet into 1/8-inch or smaller pieces.
The marshmallows are wonderful dipped in chocolate. The recipe and instructions for dipping are on the Washington Post website here.)
MAKE AHEAD: The marshmallows can be stored in an airtight container for up to 2 weeks or frozen for up to 1 month. 96 generous 1-inch marshmallows
1/2 cup confectioners’ sugar, plus more for dusting the marshmallows’ surface and the work surface
1/2 cup plus 2 tablespoons cold water
2 1/2 tablespoons unflavored powdered gelatin (3 to 4 packages)
2 cups granulated sugar
1 cup light corn syrup
1/3 cup crushed peppermint pinwheel hard candies
1/8 teaspoon salt
1/2 cup warm water
2 teaspoons vanilla extract
3 or 4 drops peppermint oil (optional)
2 or 3 drops red liquid food color (optional)
Directions: Grease a 9-by-13-inch flat-bottomed baking dish with nonstick cooking oil spray. Line it with enough parchment paper so it overhangs by 1 inch on 2 opposing sides, then grease it with nonstick cooking oil spray. Generously and evenly sift the 1/2 cup of confectioners’ sugar onto the paper; the marshmallow will stick to any spots that are missed.
Place the cold water in a small bowl. Sprinkle the gelatin over the surface. Let it stand, stirring once or twice, until the gelatin softens, about 6 minutes. Stir together the granulated sugar, corn syrup, crushed candy, salt and warm water in a 3-to-4-quart saucepan over low heat, stirring constantly until the candy and sugar have dissolved. Increase the temperature to medium-high and bring to a full boil, stirring constantly; boil for 20 seconds, then stir in the proofed gelatin. Cook for 30 seconds, stirring as the mixture bubbles.
Remove it from the heat and stir in the vanilla extract and oil of peppermint, if using. Stir to make sure the ingredients are completely dissolved. Strain the mixture through a fine-mesh strainer into the bowl of a stand mixer; discard any remaining solids. Use a balloon whip attachment to beat the mixture, first on low speed, then gradually increasing the speed to high. Beat on high for 6 to 7 minutes, until the mixture has stiffened, lightened in color and become quite fluffy. If using, add the drops of food color, separated from one another. Grease both sides of a flexible spatula with nonstick cooking oil spray; use the spatula to fold the color into the mixture just until lightly rippled and swirled.
Use the spatula to scrape the marshmallow mixture into the prepared dish, spreading it evenly to the edges. Generously sift confectioners’ sugar over the marshmallow surface. Evenly coat a second sheet of parchment with nonstick cooking oil spray; pat the sprayed sheet down on the marshmallow surface. Cover the top with foil.
Let the mixture cool and firm up; this will take at least 6 hours and up to 24 hours; the mixture will become firmer and easier to handle if left the full 24 hours. After that time, refrigerate it if not using promptly. To cut the marshmallows: Sift about 1/4 cup confectioners’ sugar onto a large, clean cutting board. Remove the top sheet of parchment paper from the marshmallow slab, then invert the slab on the sugared surface. Peel off the second sheet of parchment paper and sift more confectioners’ sugar over the top.
Using lightly oiled kitchen shears (preferred) or a large, sharp, lightly oiled knife, cut the slab crosswise into 12 portions and lengthwise into 8 portions to form generous 1-inch marshmallows; or cut as desired. Dust all of the cut surfaces of the marshmallows with confectioners’ sugar to reduce their stickiness. As necessary, clean off the knife and re-oil. Dust the cut marshmallows all over with extra confectioners’ sugar so they don’t stick together during storage. Store, loosely packed in an airtight container, for up to 2 weeks; for longer storage, freeze for up to 1 month. Defrost before serving.

I don't think these particular candies are affected too much by high altitude–well at least I hope not. Good luck!
Me too, I'm going to have to try them the marshmellows, especially since they don't involve a candy thermometer. I haven't quite figured out candy making in the high altitude yet.
I made your Nicely Spicy Cranberry-Pear Muffins last night and they were very good. Another favorite for my husband. I'll have to pick up more cranberries for the freezer so I can make them all year.
Thank you and Merry Christmas!
Got to make these–they look SO good.