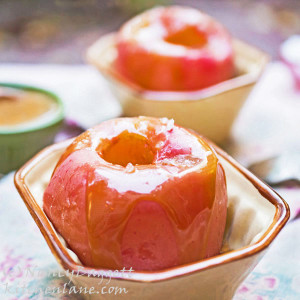
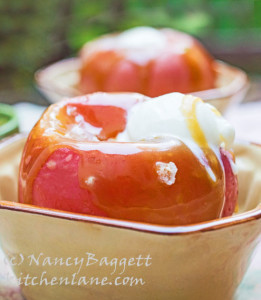
 When I was a child, my mother used to fix baked apples and serve them as a family “dessert.” I was actually fine with this because we didn’t always have a dessert, and she stuffed the apples with enough brown sugar and butter to meet my minimum dessert sweetness and richness criteria. As an extra treat, she sometimes let us add a scoop of ice cream to top our apples. That simple addition instantly boosted them into my 4-star dessert realm!
On occasion she set out a pitcher of our fresh-from-the-cows cr eam to use as a topper for our baked apples instead. This did not please me at all! It was downright disturbing to my hear my grandmother proclaim plain cream “better” on baked apples than ice cream. It most certainly was not! Like a lot of older people of that era, she had the habit of drinking the sour-watery buttermilk left from churning butter (ewwwww!). This confirmed for me that her taste buds were terribly “off’ and could not be trusted.
Though some home cooks put a pinch of salt in with the brown sugar when they readied baked apples, the currently chi-chi idea of finishing baked apples by adding a little sea salt and drizzling on some caramel sauce hadn’t yet taken hold. Brown sugar caramel sauce–an American-style caramel made by boiling down brown sugar, cream and perhaps corn syrup–was mostly reserved for topping sundaes. Nobody I knew was even familiar with French caramel sauce, the kind made by heating white sugar till molten, dark, and slightly bitter. Nobody knew about fancy salts either, other than those required for curing hams and making pickles. The basic thinking was that if you just  relied upon the fresh, crisp, quality apples you’d grown on your own farm, your baked apples would be tempting without any extra fussing.
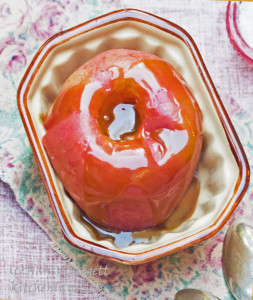
Which to a point was true…. But I’m still thrilled with today’s fancier, over the top (literally) presentation of baked apples bathed in brown sugar caramel sauce and garnished with sea salt. This is a died-and-gone-to-heaven combo–if you haven’t tried it you really must, asap.
To develop its rich, deep flavor, this American-style caramel sauce does require a good bit of cooking and stirring to reduce and caramelize the cream. This yields a look and taste reminiscent of the popular Latin American product dulce de leche. ( That’s because in both cases the milk product, not the sugar, is caramelized.)
Once the brown sugar caramel sauce is ready, it can be stored for up to two weeks in the refrigerator, and quickly rewarmed for serving over ice cream, pecan or apple pie, or to make the best baked apples ever! I’ve comparison-tested a wide array of apples and was surprised to find that some were much better for baking whole than others. Those recommended on the list here hold their shape and color well, and are slightly tangy-tart, which balances the sweetness of the caramel. I used Braeburn apples for the photos here–they were delish!
- 1½ cups heavy (whipping) cream
- 1¼ cups packed light brown sugar
- 1 cup dark corn syrup
- 5 tablespoons unsalted butter, cut into chunks
- ⅛ teaspoon salt
- 1½ teaspoons vanilla extract
- Thoroughly stir together the cream, brown sugar, corn syrup, butter, and salt in a heavy 4-quart saucepan or pot. Bring to a boil over medium-high heat, stirring constantly with a long-handled wooden spoon. When the mixture is boiling briskly, wipe any sugar from the pan sides using a pastry brush dipped in warm water (or use a damp paper towel). Wash off the stirring spoon.
- Adjust the heat so the mixture boils briskly, and cook, occasionally stirring and scraping the pan bottom. As the mixture starts to thicken and turn the color of rich medium-dark caramel candies, lower the heat slightly and stir more frequently; the total cooking time should be at least 7 or 8 minutes. Remove the pan from the heat; let cool 5 minutes. Stir in the vanilla. Let stand until the caramel is cooled to barely warm. If the caramel is too stiff to pour over baked apples, thoroughly stir in 2 to 3 teaspoons warm water. If necessary, thin with a little water until the desired consistency is reached.
- Use the caramel immediately or cover and refrigerate for up to 10 days. Rewarm on low power in a microwave oven; stir and check the consistency every 30 seconds as the caramel should not be heated to a boil again. If the caramel has stiffened too much during storage, thin it to the desired fluid consistency by thoroughly stirring in a little warm water. To serve, spoon the warm caramel over baked apples; add a scoop of ice cream if desired.
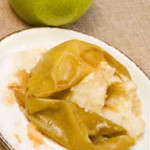
The surprising results of my comparison baking reveal that some apples are much better for baking whole than others; here’s the list. Tip, skip Granny Smith shown in the pic below–neither tasty nor pretty!


Leave a Reply